
Configuring Okta Org2Org
Setting up Org2Org and managing it within your company's Okta instance when you have no idea what you're doing.

The Request:
Use the company's main Okta instance to manage access to the dev Okta instance. The main goals being to:
1) manage access for users who need admin rights into dev
2) manage access for users who need to manage the company app(s) in OIN (Okta Integration Network) Manager
Breaking It Down
There are actually two requests that need to be addressed here:
Configure and connect two Okta organizations (dev and main) using "org2org": Enable user provisioning, authentication, and single sign-on (SSO) capabilities between the two instances.
Provision access to an app in the dev instance using the main Okta organization: Allow users to authenticate and access the app using their credentials from the main Okta instance.
Before Starting
You must be a super admin access in both the main instance and the “dev instance” (if your app integration has not bee requested/submitted yet you need them to start here: https://oinmanager.okta.com/ and here is other helpful info: https://developer.okta.com/docs/guides/submit-app-prereq/main/ and https://developer.okta.com/docs/guides/okta-integration-network/)
Review Okta's documentation on How to Configure SAML 2.0 for Okta Org2Org Application. (Keep in mind. When configuring this Okta Org2Org connector application, the Spoke (source) Okta org refers to the main Okta instance and the Hub (target) Okta org refers to the dev Okta instance.)
Have the requestor determine the following:
a) the user's who'll require admin rights in dev Okta instance
b) the user's who'll require access to manage the company app in OIN and
c) the default departments and/or teams who will need access
d) what access the users, departments and/or teams will need to manage the company app[if multiple apps within dev Okta instance] Have requestor identify the specific app(s) within the dev Okta instance that access and rules will be scoped to
Determine if you will be creating users using JIT (Just-In-Time) Provisioning or redirecting them back to the main Okta instance sign-in page.
The Plan
Configure the Okta Org2Org Okta connector application within the Main Okta Org: Follow steps found in section Configuration: Step by Step
Provide Specific Users Admin Rights within Dev Okta Org:
- Identify the users who require admin rights in dev Okta instance.
- In the main Okta instance, create dedicated Okta group and add all users.
- Grant Okta groups appropriate permissions.Provide Specific Users Access to Manage the Company App in OIN Manager:
- Determine the specific application in use on the Okta dev instance. You'll need to know to be able to fill out the SAML Protocol Settings later.
- Identify the users who need to manage the company's app in the OIN Manager.
- Determine what specific permissions/access level users need within the dev instance for managing the company's app.
- In the main instance, create dedicated Okta group and add all users.
- Grant Okta groups appropriate permissions.Testing: Ensure access management setup is working as intended.
Configuration: Step by Step
You'll be configuring the Okta Org2Org connector application in the main Okta instance (Spoke/source) and retrieving the SAML Protocol Settings from the dev Okta instance (Hub/target).
1) In the left menu click Security > Identity Providers.
2) Click the Add identity provider button.

3) Select "SAML 2.0 IdP" and click Next.
Select an Identity Provider.
4) Set a name for the provider.
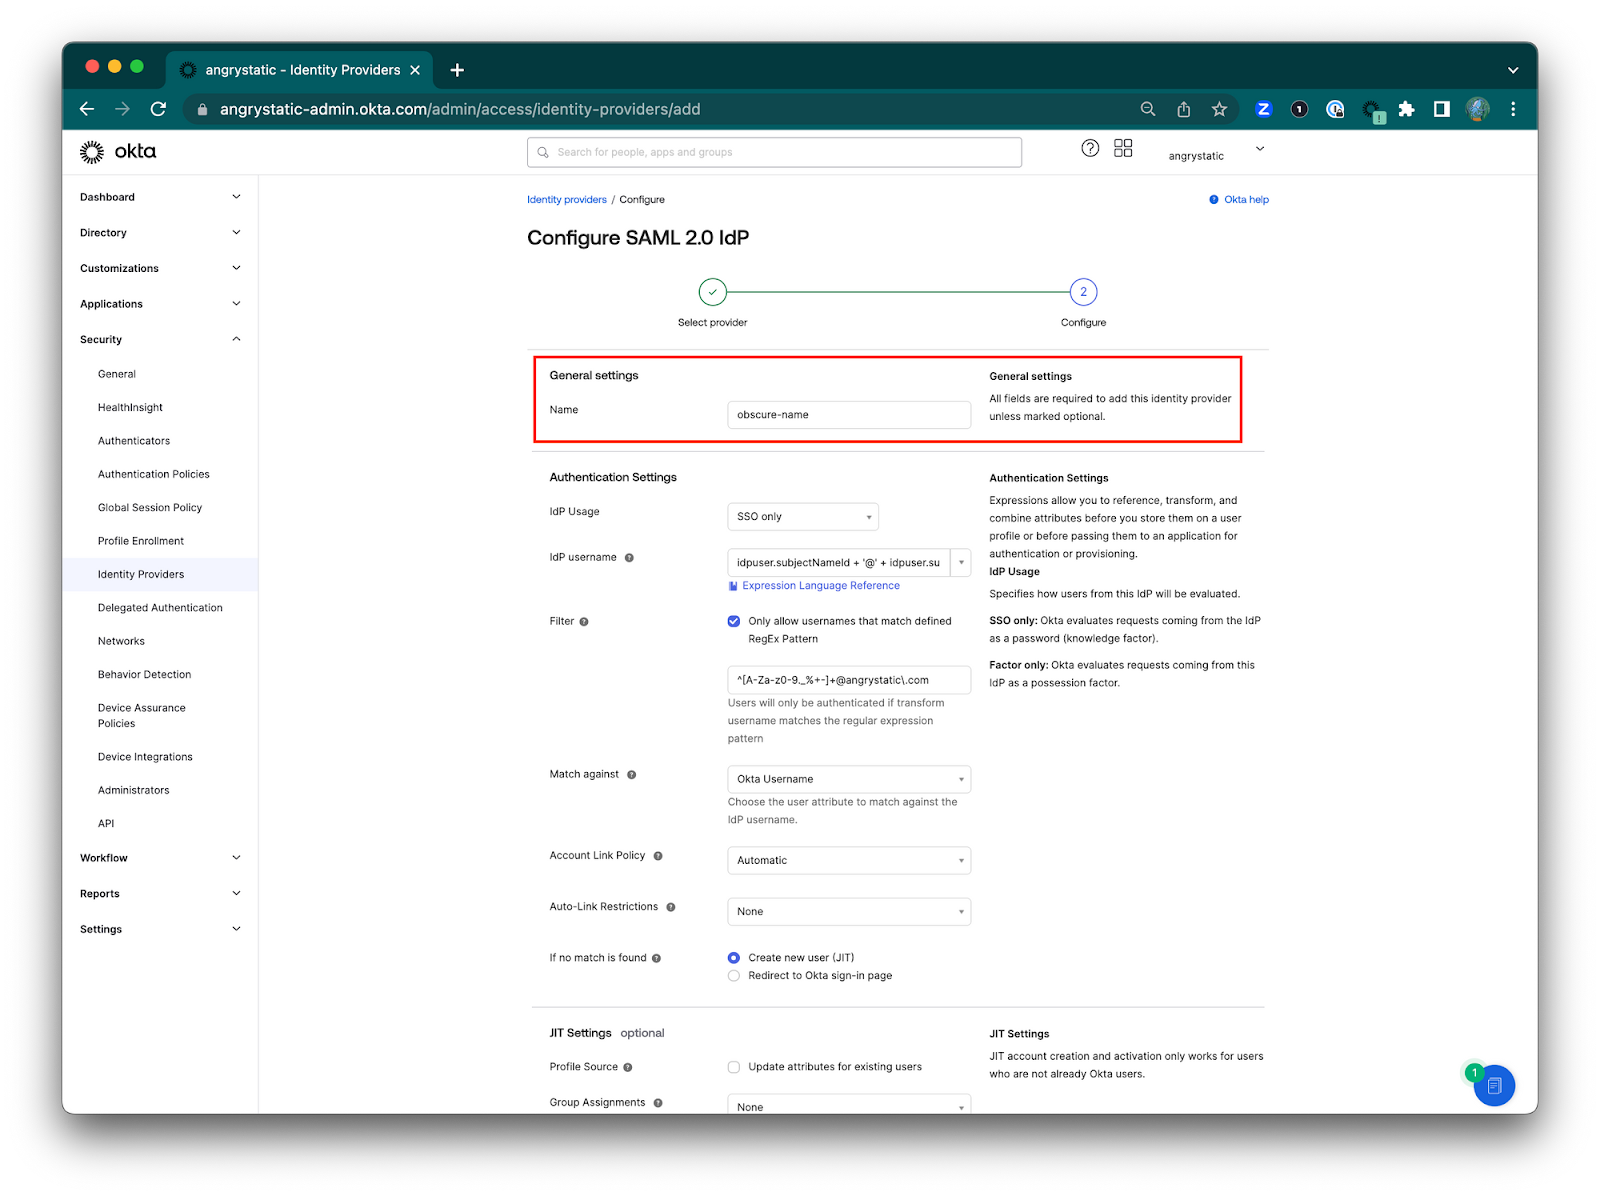
5) Set the IdP username. Select idpuser.subjectNameid + '@' + idpuser.subjectNameQualifier

6) Filter. Check the box to "Only allow usernames that match defined RegEx Pattern" then input the expression pattern: ^[A-Za-z0-9._%+-]+@angrystatic\.com
7) Match against. "Okta Username" the attribute of the main Okta instance (Spoke/source).
This is to ensure that only users who's username (assuming usernames are set to be the same as their email) matches the expression will be authenticated.
8) Account Link Policy. "Automatic" to automatically links the user's IdP account with a matching Okta account.
9) Auto-Link Restrictions. This is if I want to restrict linking to specified user groups.
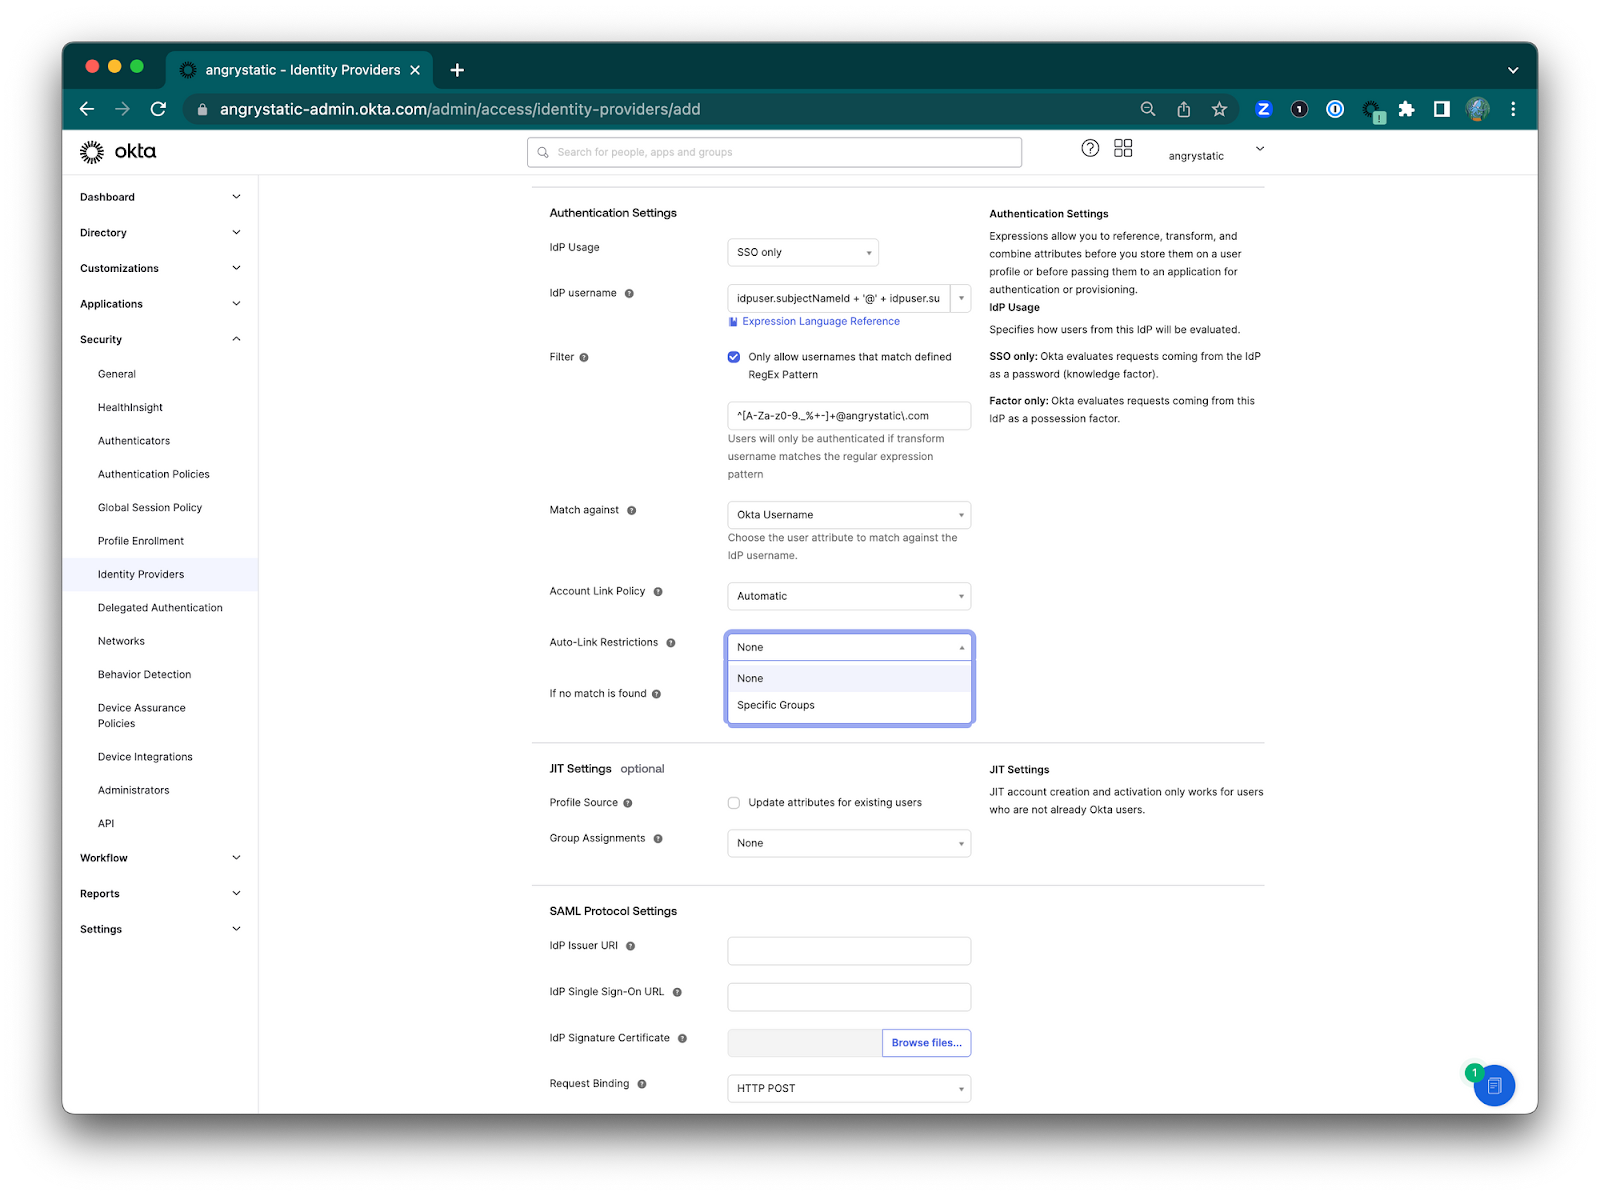
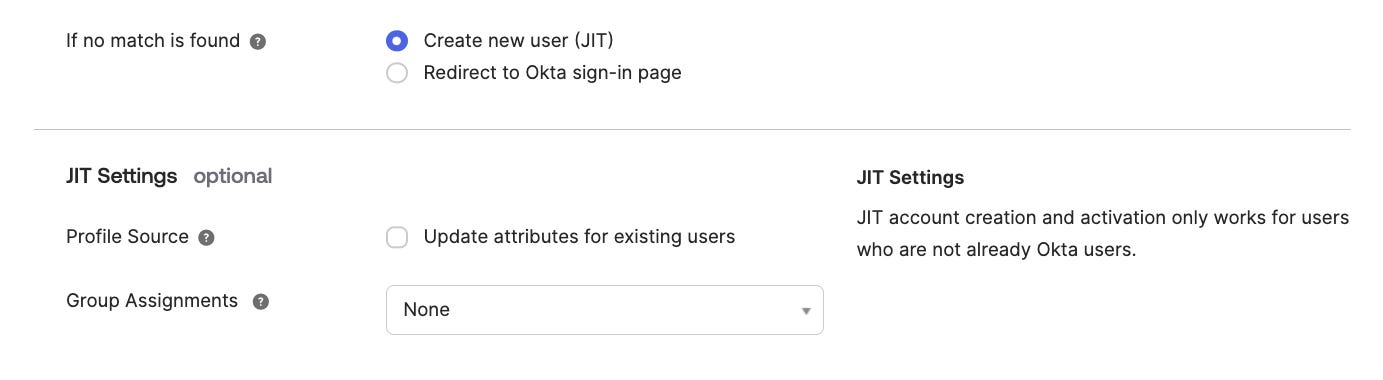
If no match is found: Select your preferred option.
"Create new user (JIT)* or "Redirect to Okta sign-in page"
*Just in Time (JIT) Provisioning is a SAML protocol based method that is used to create users the first time they log in to an application via an identity provider.
Redirecting to Okta would be redirecting to your main Idp (Okta in this case) instance (the Spoke aka source).
10) JIT Settings. Since this setting is optional it'll depend on the stakeholders
Profile Source. Leave the box unchecked for "Update attributes for exiting users". Okta's instructions "Note: If the Org2Org application is configured to update user profiles and you set the IDP as a profile source, the user updates will cause provisioning errors. Our recommendation in this scenario is to have this option deselected."
Group Assignments. Select your preferred option.
11) Configuring the SAML Protocol Settings
These can be found in the Okta admin app:
IdP issuer URI
IdP Single Sign-On URL
IdP Signature Certificate
Request Binding
Request Signature
Request Signature Algorithm
Response Signature Verification
Request Signature Algorithm
Destination
Okta Assertion Consumer Service URL
Max Clock Skew
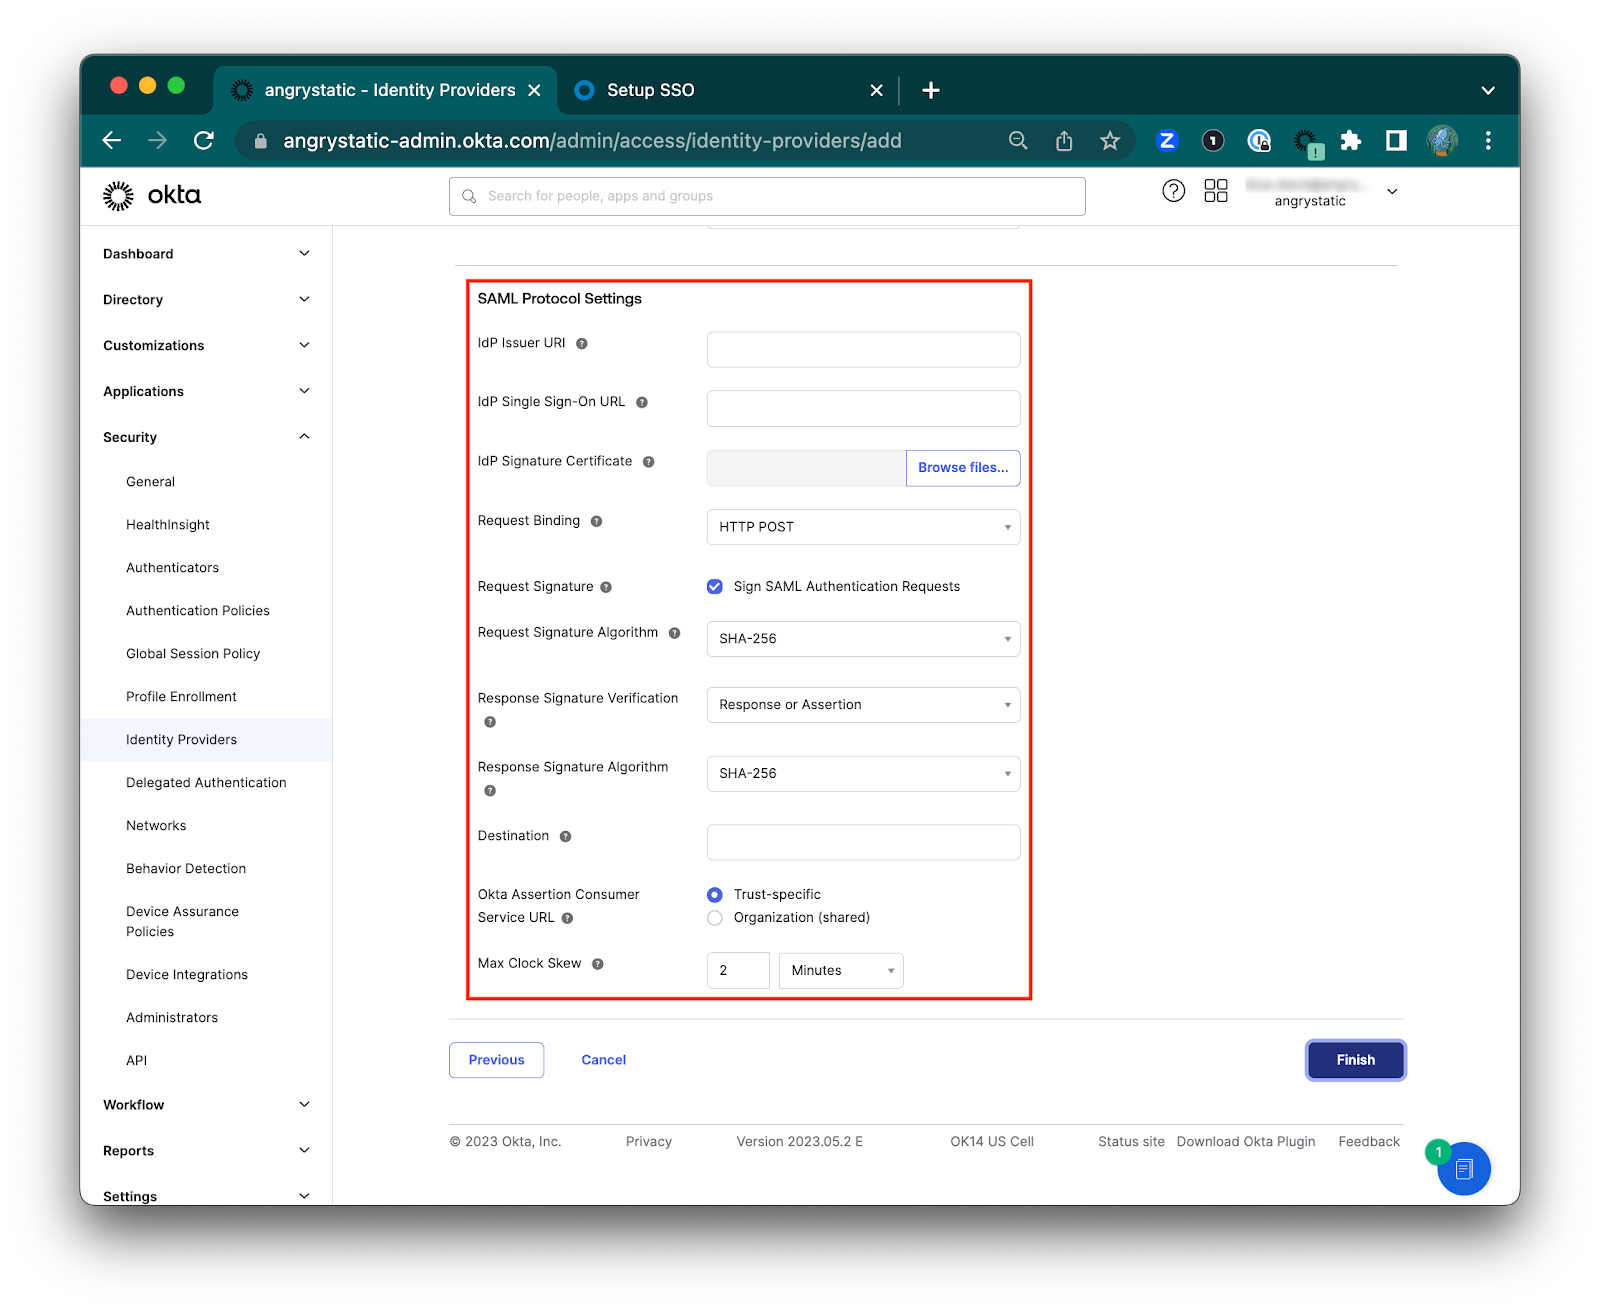
12) Click Finish.
13) Now go back to the Identity Providers page and see the new Identity Provider you just added.
Click the arrow to expand the details for that Identity Provider.
Make a copy of your Assertion Consumer Service URL and Audience URI values.
14) Go back to your main Okta instance (company.okta.com), and in your Okta Org2Org application select the Sign On tab, then click Edit:
Scroll down to Advanced Sign-on Settings.
Enter your Assertion Consumer Service URL and Audience URI you made a copy of into the Hub ACS URL and Audience URI fields.
Click Save.
15) That’s it! Your Org2Org app is now set.
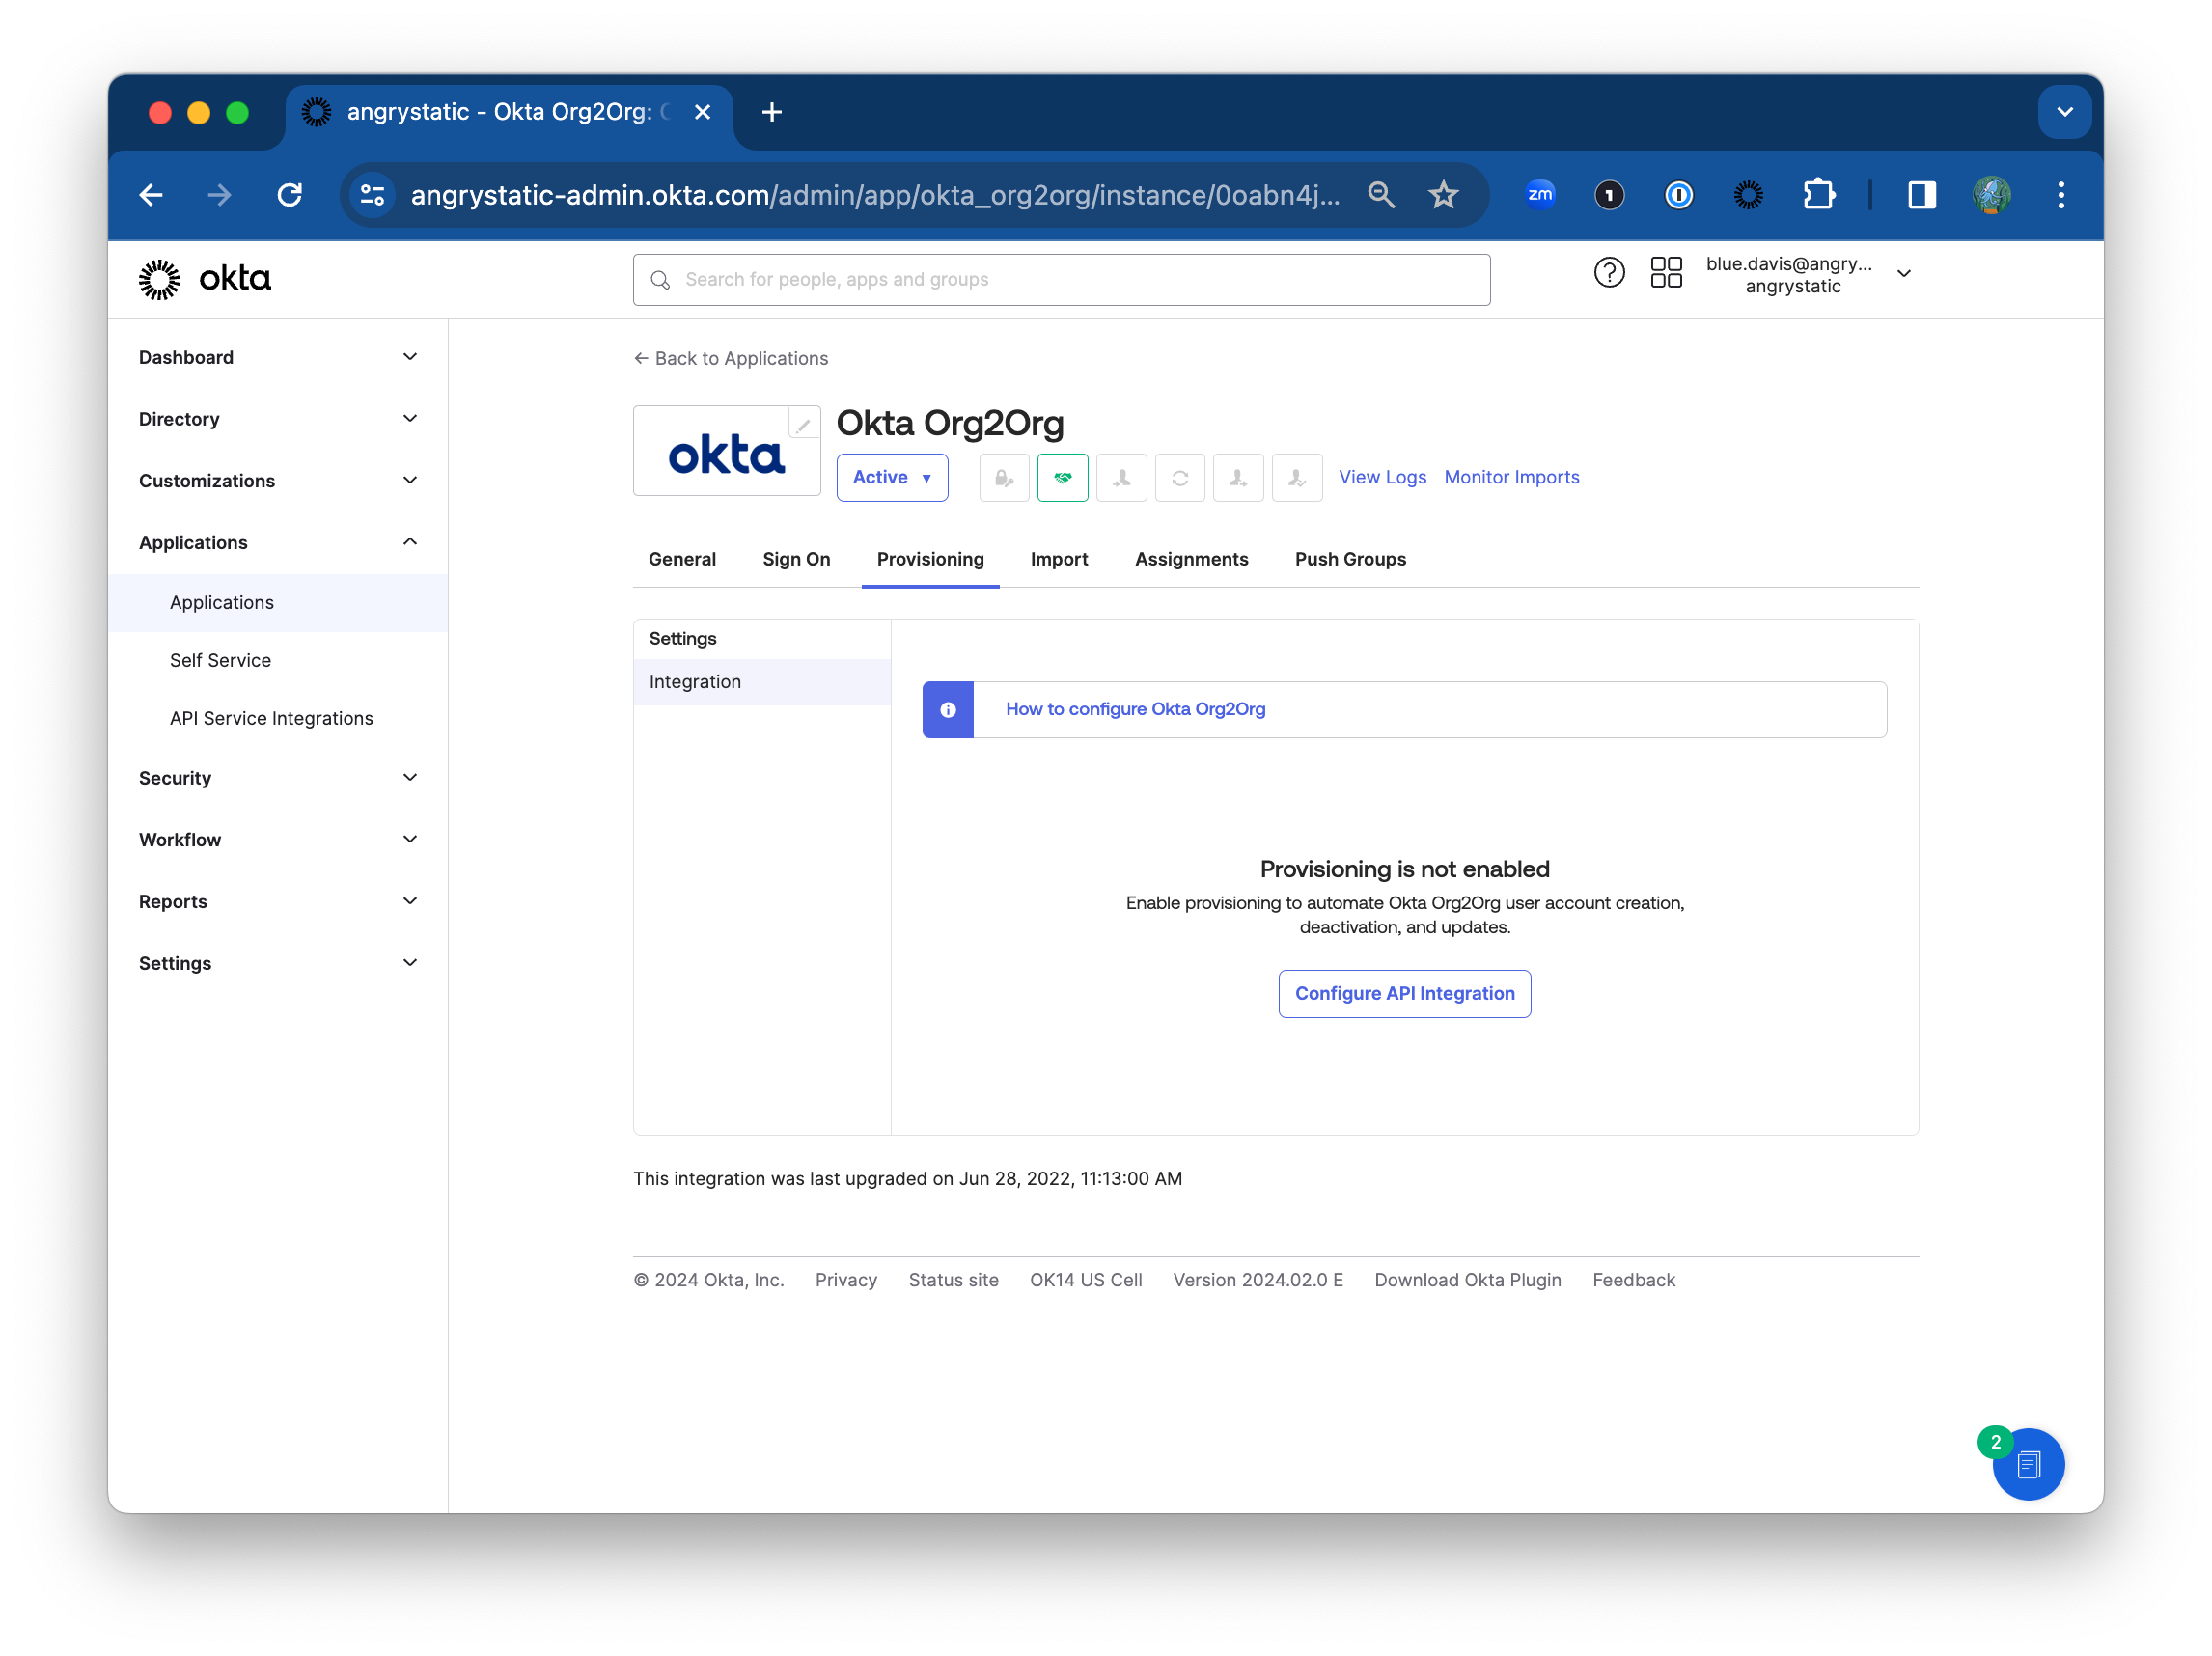
16) To set up the “Provisioning” tab for your new Org2Org app follow the instructions here: Integrate Okta Org2Org with Okta. This will allow you to manage authentication and provisioning for users from your main Okta instance (company.okta.com) to your dev org.
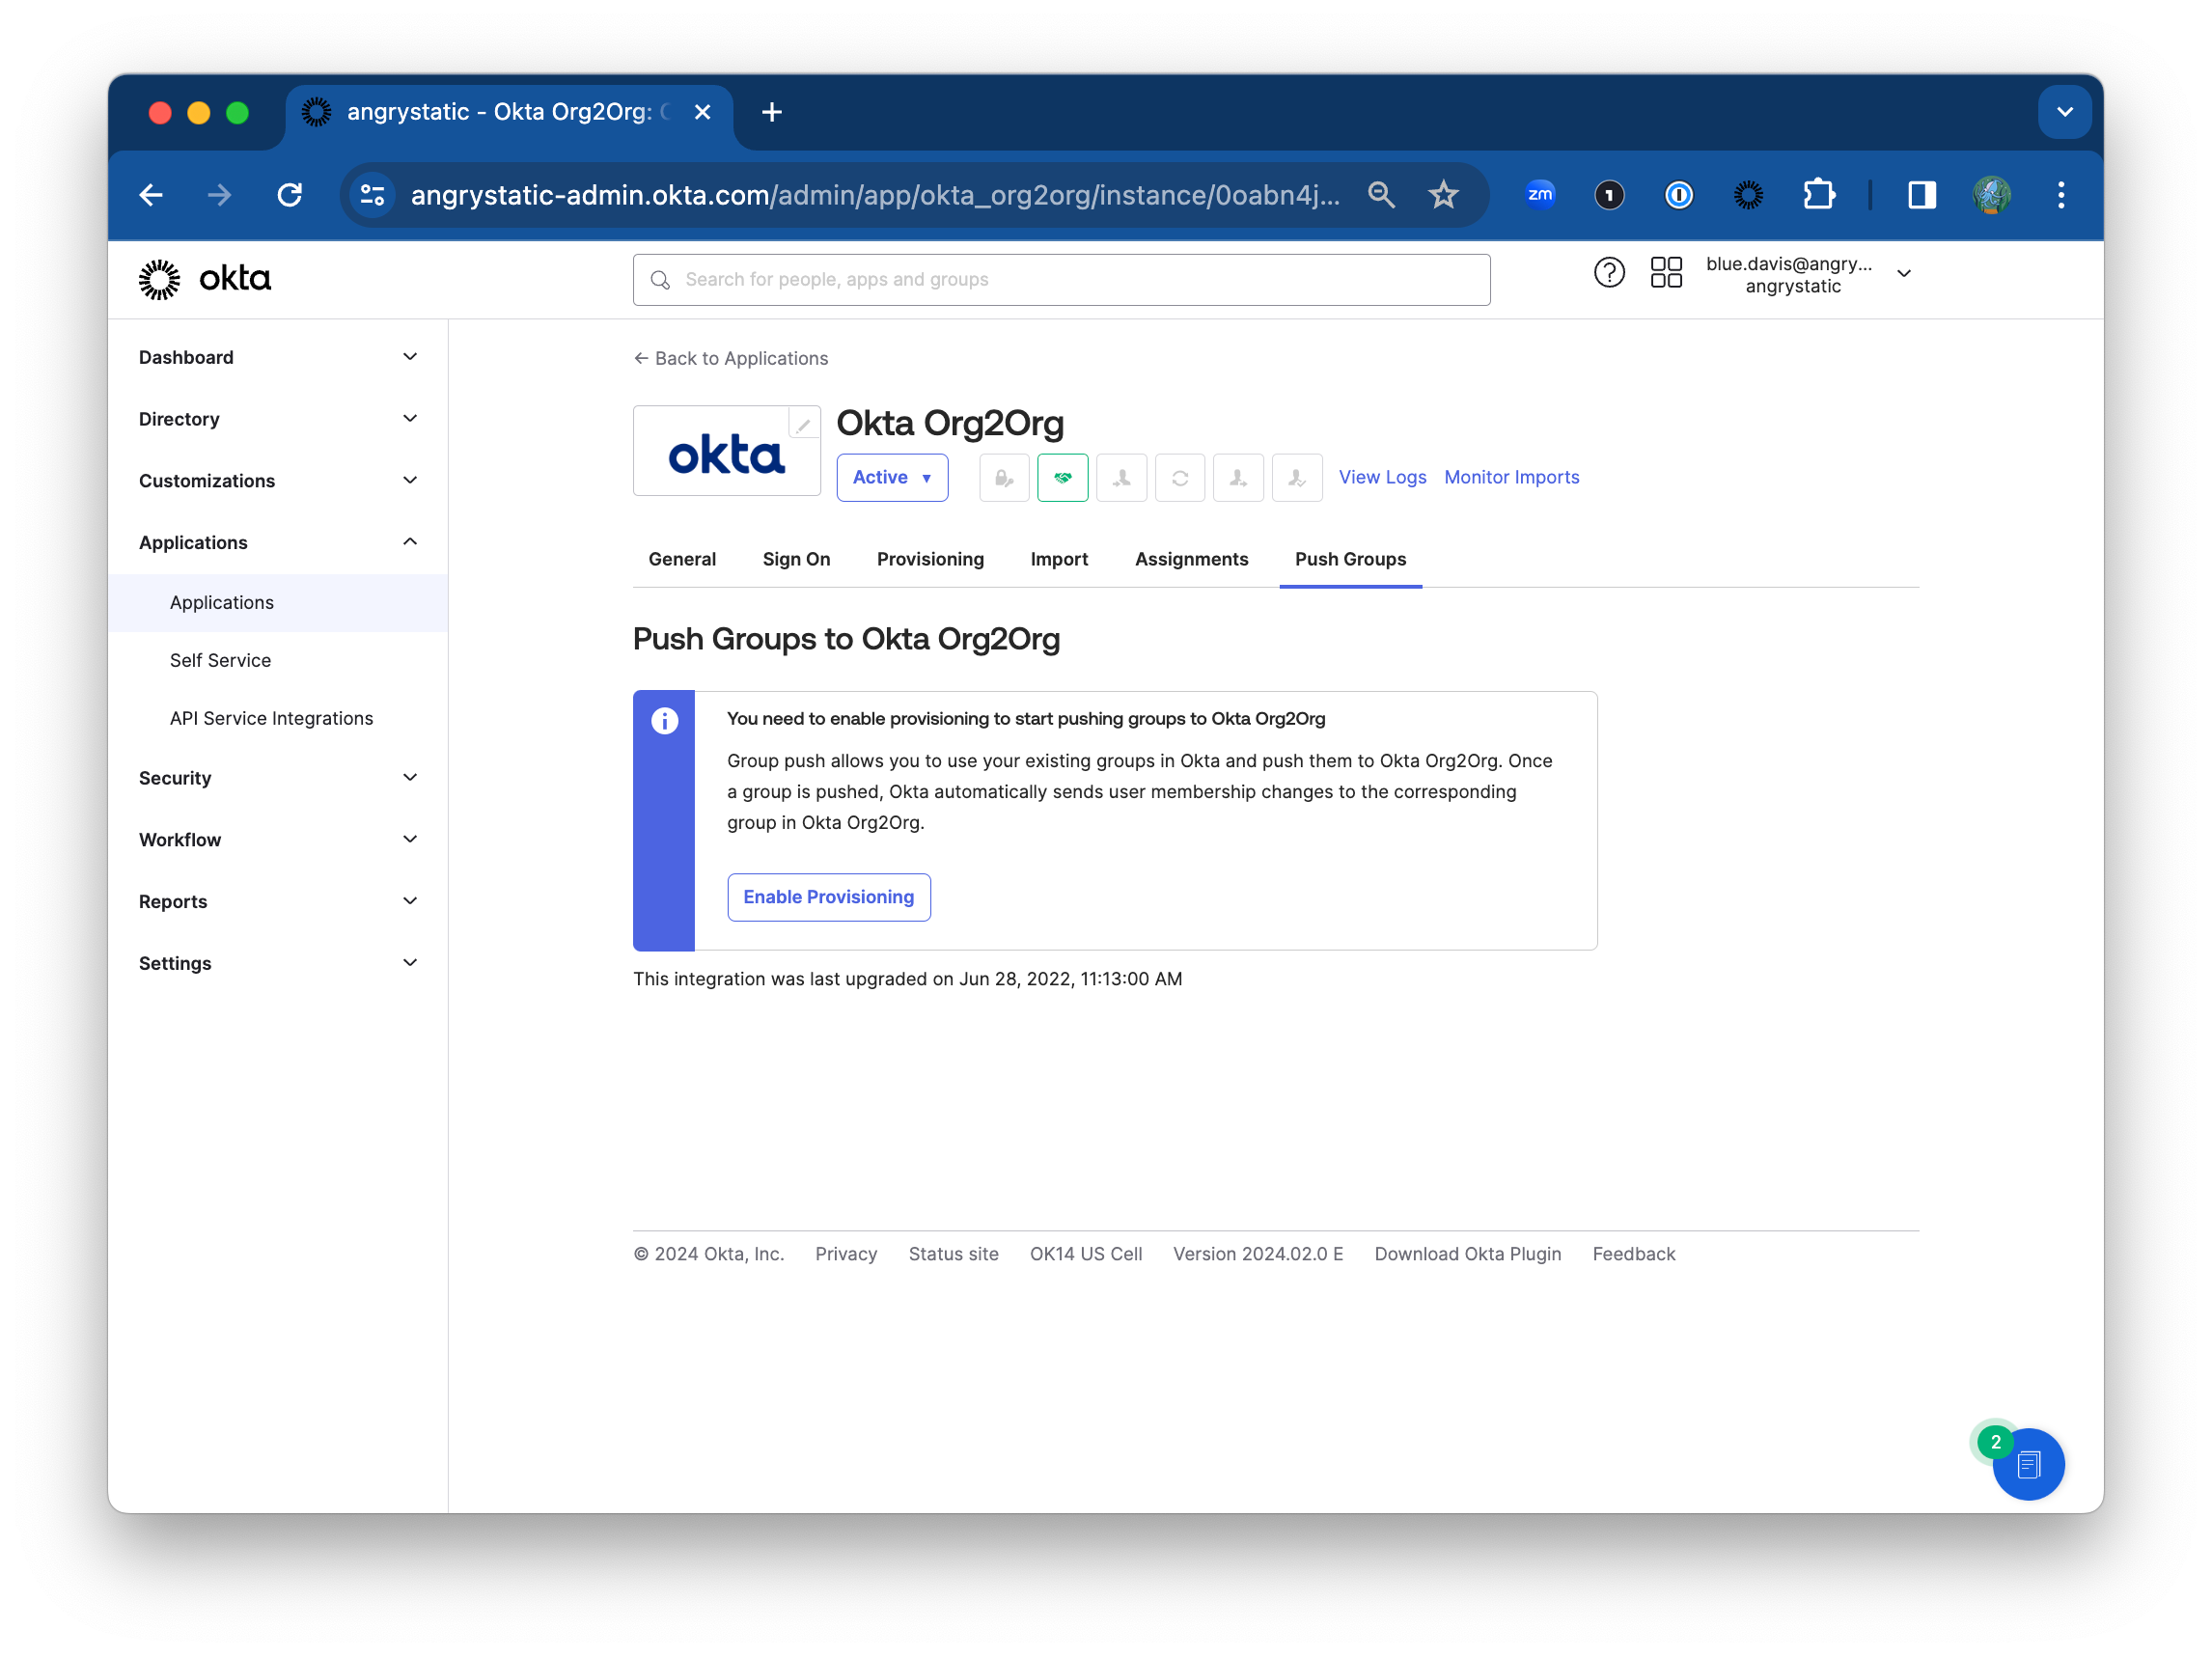
17) Recommended: Set push groups for your new Org2Org app (eg. Org2Org -Admins, Org2Org - Engineering, etc) and set permissions to makes assigning access easier for the future. You can also set Okta group rules for if user has X property then assign to X groups.
You will need to enable provisioning to start pushing groups to Okta Org2Org
Notes:
See section “Configure an Application for Hub/Spoke” here: https://saml-doc.okta.com/SAML_Docs/Configure-SAML-2.0-for-Org2Org.html
If asked, you can not set your main Okta instance URL company.okta.com as your sole sign-in method or have the dev.oktapreview.com login page redirect there because your dev org is the hub (target) and the company.okta.com is the spoke (source); meaning company.okta.com is the IdP and the dev org is the SP (service provider) in this case, and the authentication is being done on the SP, org2org app side.
XX